Learning How to Use WordPress - Start Wordpress CMS from Your Browser
Learning Wordpress for beginners and for those who have not really used it much.
Learning Wordpress for beginners and for those who have not really used it much.
From the side menu select the Add New Page button: you will get a page like the Visual to the right once you have clicked on that button.
The majority of the form (that is basically what this page is, a form) is self explanatory. We imagine just getting to this point would be more difficult than learning to use the WP editor, if you did not know much about WP but, now you are here so we will point out a few important functions.
The form itself is a lot like Word or Writer or any other text editor, it has the buttons at top of the text-area box which give you font styles options such as highlighting text, changing font colors and size of fonts. You can also insert pictures and videos by clicking on the Add Media button and upload a video that will stick to the spot where you last left your mouse cursor prior to clicking on Add Media.
The big blue "Publish" button on the far right is the piece to the puzzle which almost every beginner passes up and gets stuck on.
When I first was learning WP I could not figure out why my page was not showing on the Website. Turns out that I simply did not know I had to click on Publish to get the page to show up on my Website.
Save as apposed to Publish. It is important to click on this button when you are finished with your initial entry to the page you are working on. YOUR PAGE WILL BE "AUTOSAVED" BY WP BUT NOT PUBLISHED* UNTIL YOU PUSH THE PUBLISH BUTTON.*Published just means that your page will show on the Website to the public. You can actually hide some pages from being displayed by making them Private, which can be done with the Visibility button above the Publish button. This is really handy for pages that are outdated but may be useful to bring back to your Website at a later time when they are needed again. Saving you the work of rewriting the whole thing over again. This is also good for Drafts of a page you may not be ready to release to the public, as of yet but, you want to do the work ahead of time.
Also note that WP does not use very many labels to tell you which form area is what....
The top open form field is for the title of your page and the lower box is obviously the area you insert text, media even URL links which all show up on the page of your Website once you Publish the page..
There are two tabs to the top-right of the text box that can be toggled---be sure you use the one that says Visual and not the one showing in this example that says Text. Text is for code (text based code (we know it is confusing but just go with it)) and Visual is really a plus because in this mode you can copy and paste other text from an external page or from your Windows MS Word document file into your page and it will look exactly (Visually) like what you copied it from.

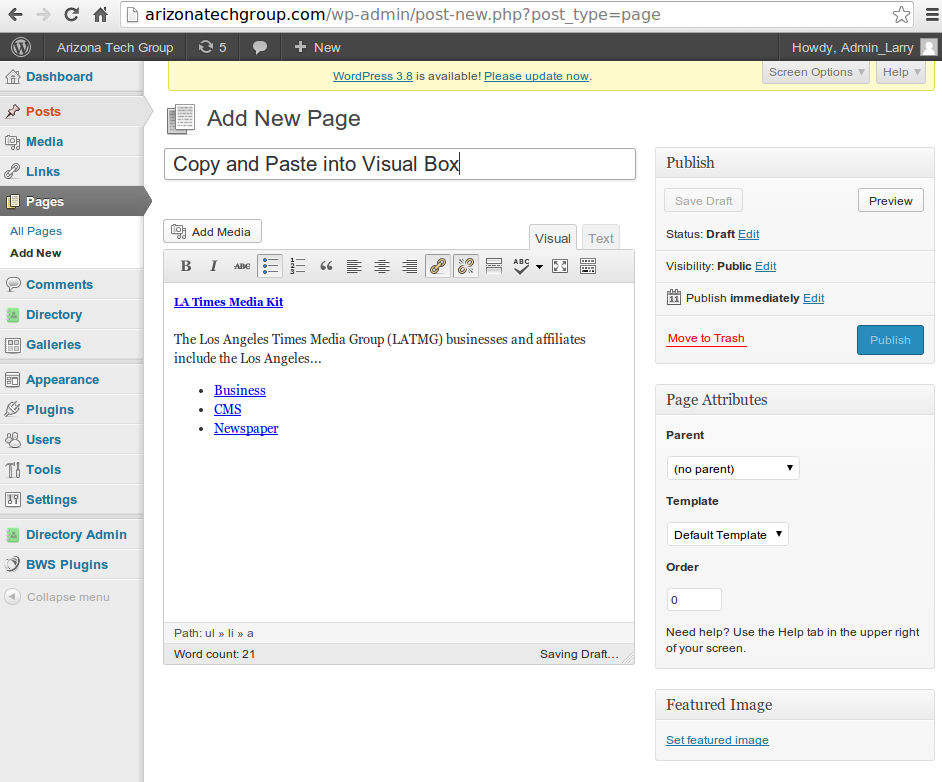
Example of "Visual" text editor. I copied text and the blue webpage links from an Internet page. So now all the data is 'embedded' into the text without you having to make the manual link by typing in all the other code that is hidden from view such as changing color to blue and making the Internet link active. Also I had no typing to do to get all the content/text onto my page, just copy and paste.